How to Test API Requests in Mailchimp


This article will help you understand how to test API requests in Mailchimp and send them to the setting for the backend developer. Email marketers use API requests to transfer the data from the site to the email platform. It can be the subscribers to the list transfer, adding tags to them, changing the meanings of the additional fields, sending trigger emails from the platform on request.
In this article, we will share the ways of working with API requests in Mailchimp. In theory, an email marketer should use the API guide by Mailchimp to create the requests and specifications for the requests. But in practice, it can take much time and effort.
Also, we will show the examples of the API requests that can be tested. You can take the examples of these requests, change the data in them according to your project and test.
First of all, we need to download Postman - a program for testing requests. We will create our request and send it to the platform in it. Thus, we can check if our request is correct and if all the data goes to the platform.
Next, we will create a request URL and body and will test their work in Postman. And for some of them we will add an example of a request for PHP that a developer may need.

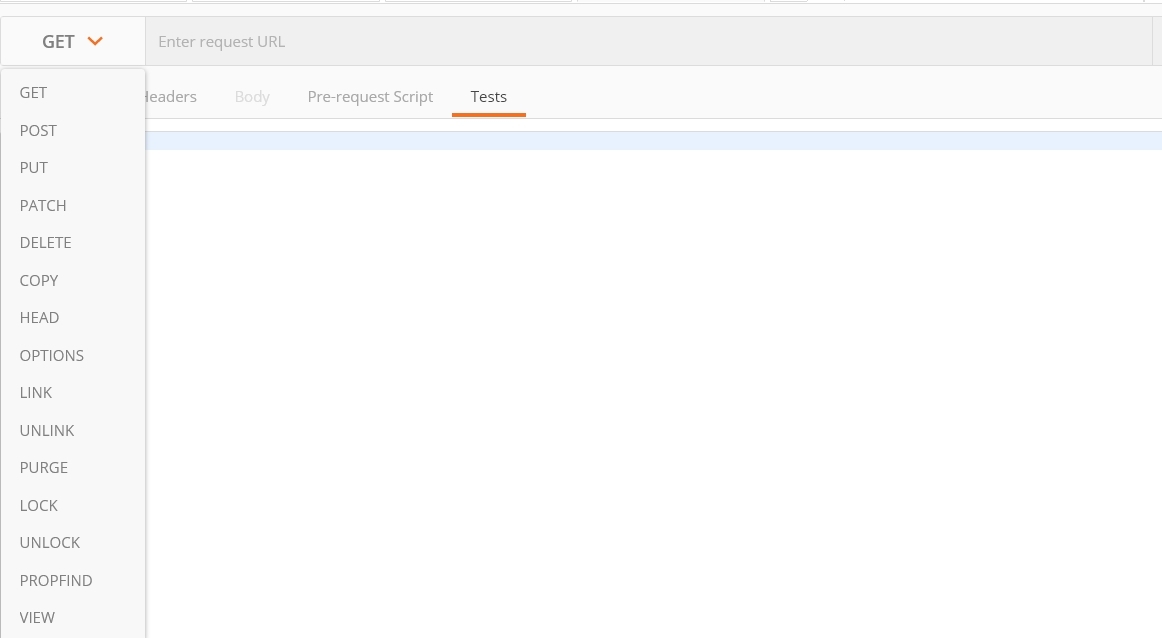
Here we write the request URL and method. There are two common request methods:
We will show the examples of what we type in the URL field later.

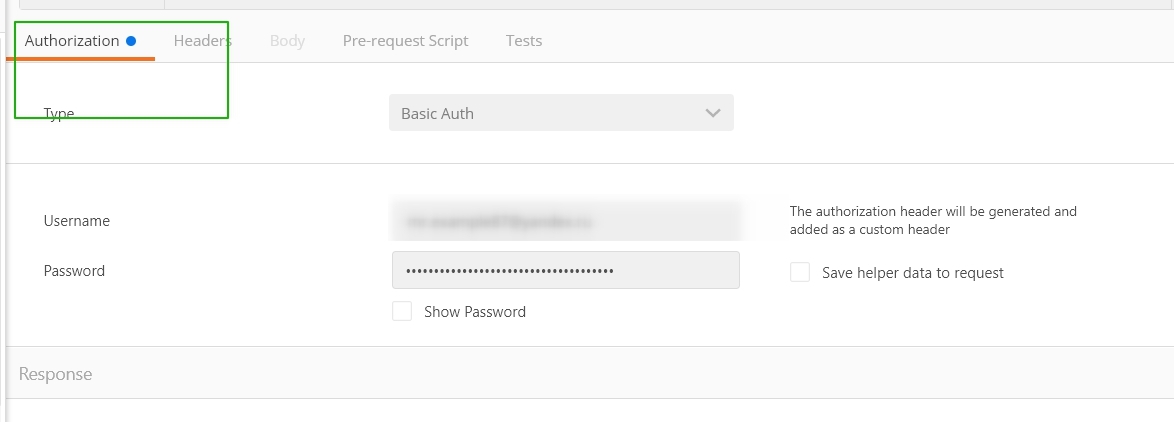
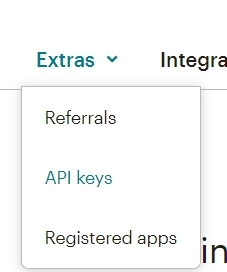
In most cases, you'll have to get authorized to access the platform. However, if you test the requests in ExpertSender, you don't need to authorize as all the data needed is already in the request. For Mailchimp, we'll need to use Basic Auth that uses API key as a password. So you enter your email or login in the Username tab and your API key in the Password tab. You can find your API key in the Account->Extras->API keys tab.


The API key is an important part of any request and should be used either in the request body or while authorizing.

It is the main part of the request: here we write what we want to do. For example, if we add a subscriber into the list, we write their email, fill in the additional fields and assign various parameters. Generally, we use json and xml requests. It is important to place the syntax correctly in the request body: close the brackets where needed or place a comma. These things are easy to miss if you have no experience with creating the requests but without them the request will be incorrect.

Here Postman will show the answer to the request. If the request isn't valid for some reason, the detailed description of the error should be here. As an answer to a successful request, the 201 created status appears (it also depends on the API of the platform).
This operation is used if you're transfering a subscriber to the platform from the subscription or registration form.
https://<dc>.api.mailchimp.com/3.0/lists/{list_id}/members/
The main parameters:


In my example it is us17.
The main parameters:
The status field should be mentioned separately. It may have one of the next meanings:
Depending on your goal you can use different meanings of this field in your request.
There are only two additional fields used in the example: first name and last name. In fact, you can transfer any meaning to any field that you have on the platform.
So, if your form has a non-standard field, then you'll need to first create it in Mailchimp and then write the data transfer in your request. You can create such fields in the "Merge Fields" tab in the audience settings.

This way we create the additional fields of the needed type. We use exactly the MERGE tags meanings, not the Field label and type. The parameter needed is highlighted in the screenshot.

So, you can add as many additional fields to your request as you need. The main thing is not to make a mistake with the punctuation marks in the request. After every field, you need to place a comma, but after the last field in the request, there should be no punctuation marks. If you make a mistake, the request won't go and Postman will return your message with an error. It is easy to notice a mistake in the program - it will be marked with a little cross.

The same icon will be used to highlight all the syntactic mistakes: incorrectly closed quote marks or brackets.
This type of the request will be useful for backend developers when they will be realizing the request script on a website.
https://<dc>.api.mailchimp.com/3.0/automations/<workflow id>/emails/<email id>/queue
Here we add two new variables:
You can find them with the help of two get requests. If the POST request sends something like commands to the system and says what to do, then the GET request takes the data. The request type near the URL changes.

Firstly we search for the workflow id
https://<dc>.api.mailchimp.com/3.0/automations/
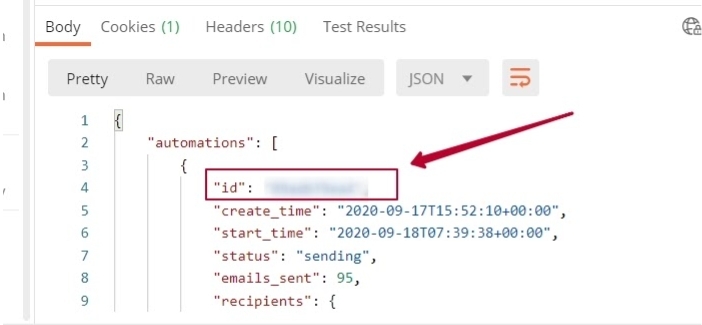
In a response Postman will show all the data on all the automations that there are in the account. The automation needed will have the API 3.0 type. You can also recognize it by the theme of the email.

The id space meaning is what we are looking for. All that's left to do is to learn the id of the email. To do it we send a request:
https://<dc>.api.mailchimp.com/3.0/automations/<workflow i>/emails
We get the automation data that will contain the email id. After this we can place the data into the original request and send the email.
Here we just transfer the addressee's email. The user is needed to be in your subscribers list for the letter to be sent correctly. This is why in some cases you need to realize several requests at once, including the add the subscriber into the list ones.
https:/<dc>.api.mailchimp.com/3.0/lists/{list_id}/members/<member_id>/tags
<member_id> is the email of the subscriber that you want to assign a tag to, syphered in the md5 hash with the help of md5 Hash Generator. Mailchimp probably syphers the data for security - not to transfer the sunsvriber's email directly in the request URL. Just input the needed email and you will get a hash that can be put into the request URL.
The request body is very simple. There should be "active" status and we write the tag we want to assign to the user in the "name". All other information, including the user's email, is transfered into the request URL.
We wish you successful integrations!
